The iPhone is one of the most prolific mobile devices in the world today. It is used by millions, from amateurs to professionals, to take photos of all kinds. While the iPhone can certainly take spectacular photos, getting the highest resolution image to upload to FotoFetch can certainly be a challenge.
In this blog post we are going to take a step by step approach showing you how to get the highest quality image from your iPhone to upload to FotoFetch.
Apple’s iOS operating system has a built in Camera and enables the user to take great photos while optimizing storage on the device, and there-in lies the rub. On modern iPhones you can set your phone to store a highly compressed version of the photo you have taken on the iPhone that is optimized for viewing on your phone. Unfortunately this version of the image is not suitable for professional business use, too much of the detail is lost in the compression and re-sizing of the image. A photographer can change the setting to only store the highest resolution image on the iPhone, however, not only does this quickly eat up storage space, but there is a better way to get those images while still saving space on your iPhone.
iPhone iOS Camera Settings
Lets first find the Camera image storage size settings on your iPhone. The screenshots below are for an iPhone 12 Pro Max, your iPhone settings may look a little different.
We first want to go to the Settings app on your iPhone and select Camera:
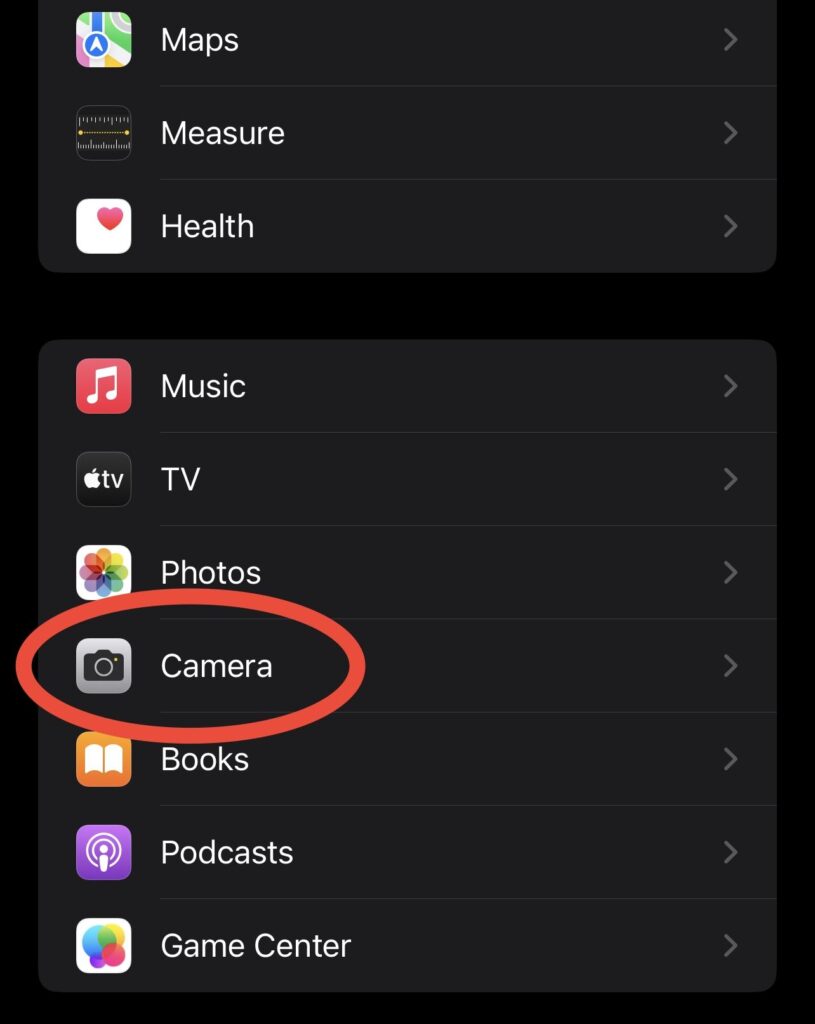
Under Camera Settings we will want to select “Formats”
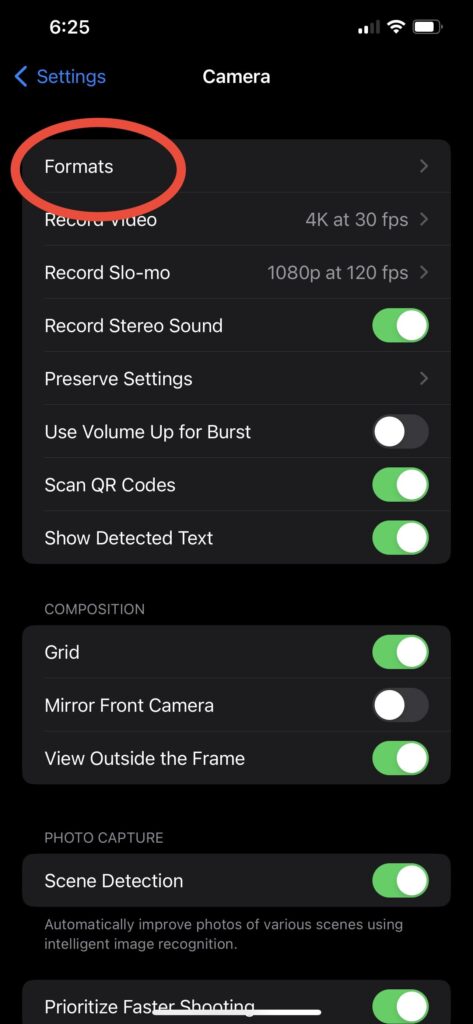
This screen contains all the options for storing images on your iPhone. Please note that not every iPhone will have the “ProRAW” setting.
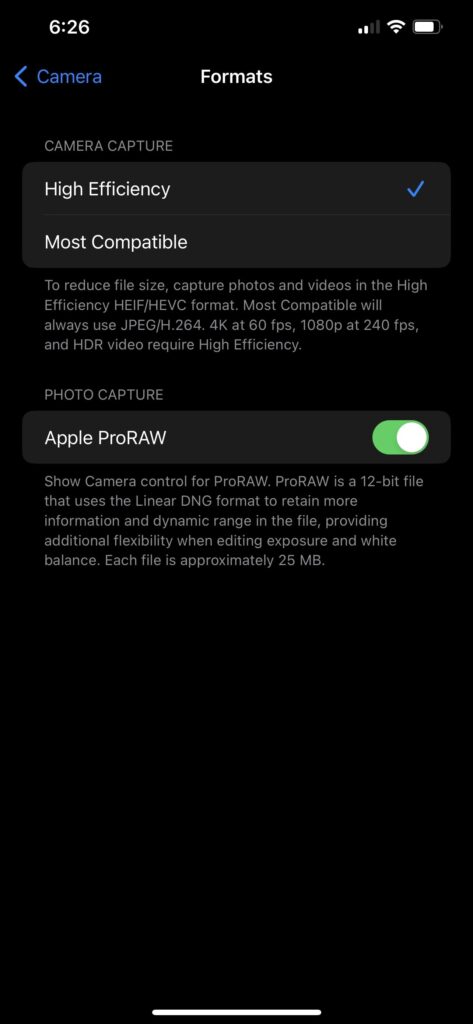
You will note that on this iPhone “High Efficiency” has been selected to optimize storage space on the iPhone. The vast majority of iPhone users have this option selected since it is required for the largest selection of video options. We recommend that you keep this options selected. With this option selected the vast majority of the images you take will be stored on your iPhone in an HEIC format and will generally be under 2MB in size.
If your iPhone supports Apple ProRAW, we highly recommend that you turn that feature on (it is off by default for most people). This will allow your iPhone to generate DNG files that contain more digital information about the image taken including more dynamic range, and will offer more flexibility when editing an image in a photo editor like Adobe Photoshop.
Now that you know where the settings are to control image size, how does one get access to the highest quality images when they need it? The simple answer is it is stored on iCloud. Unfortunately Apple does not make it easy or clear on how to get those high resolution files. We are going to show you step by step how to access those images from iCloud.com.
Make sure to have iPhoto Live turned off when taking professional photographs from your iPhone for FotoFetch.
Accessing High Resolution Images from iCloud.com
So you accepted a job on FotoFetch.com, you went on location with your handy iPhone and took the shots. Now you want to upload and submit them, but every time you try to upload the images you get these small sized files and you can’t figure out why…the camera on your iPhone certainly meets the 10 megapixel minimum requirement, and the images look good on your iPhone, so what gives?!?!
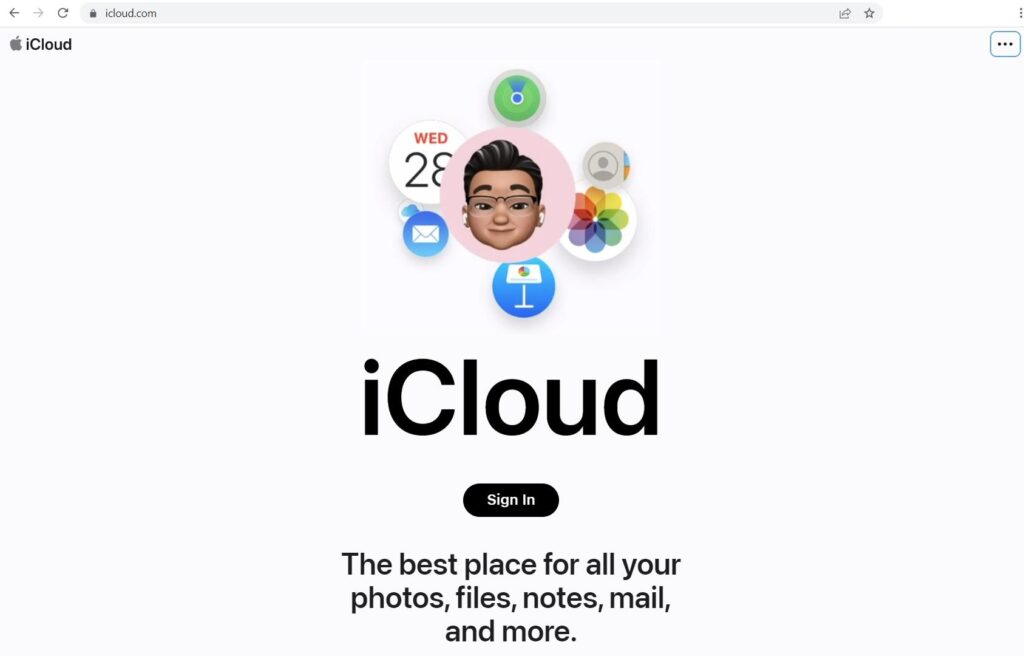
Well, as we stated earlier, they are likely being stored in a compressed format on your iPhone, and the full size images are stored on iCloud.com. So the first thing you want to do is head over to your laptop or desktop computer, fire up a web browser (we recommend Google Chrome) and head over to https://www.icloud.com/. You will need to sign in with your Apple ID Credentials.
Once signed in you will be on your iCloud Home Page and you will want to click on the “Photos” tab:
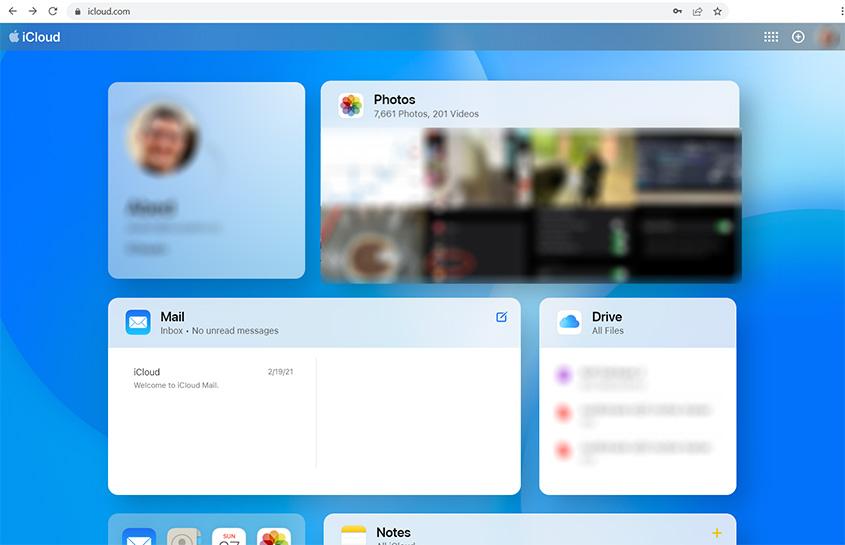
You should then see a screen similar to the one below:
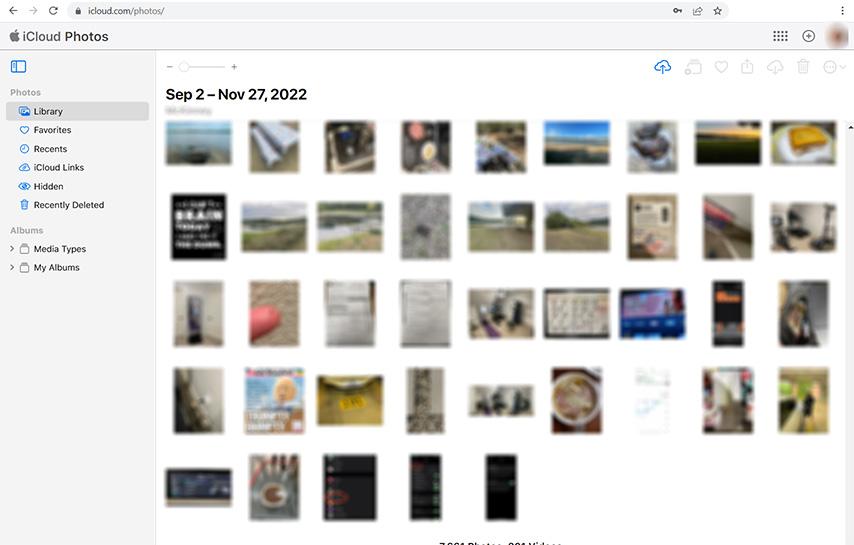
This is your iCloud Photos screen, you will be able to view all the imagery you have stored on iCloud including the ones taken from your iPhone. You can multi-select images on this screen by holding your SHIFT key on your keyboard while clicking the images you want to select.
The next step is to select the image(s) that you want to upload to FotoFetch.
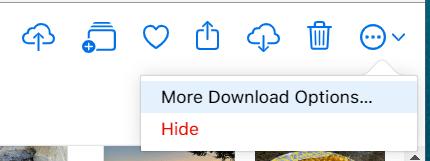
Once you have selected the images, you will want to click on the circle with the ellipses (three dots …) in the upper right hand corner of your iCloud Photos screen (see image below).

A menu will appear, you will need to click on the option titled “More Download Options…”
After selecting “More Download Options you will be presented with a dialog with two options, make sure “Unmodified Originals” is selected and then click “Download”.
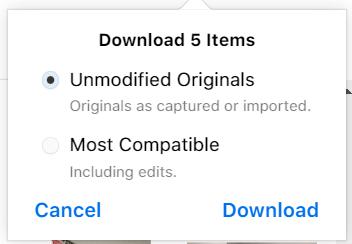
A file download will commence. If you selected more than one image the download will be a compressed zip file that will have all the images you selected. Before uploading to FotoFetch you will need to unzip the files on to your computer and then upload the high resolution images from the location that you unzipped those files.
That is all there is to it! We hope you have found this article useful and look forward to seeing all the awesome imagery you submit to FotoFetch!